How To Tackle Dust Build-up After A Large-scale Home Renovation Project

After a major renovation, the last thing most homeowners want is to face mountains of dust. Even with the cleanest contractors, the reality is that fine particles settle in every nook and cranny—from skirting boards to light fittings. As a professional after-builders cleaner in London, I’ve seen firsthand how post-renovation dust can linger for months if not tackled methodically. Dust isn’t just unsightly; it can trigger allergies, damage furniture, and affect indoor air quality. In this article, I will guide you through a structured, step-by-step approach to restoring your home to a clean, safe, and habitable condition.


Understanding the Nature of Renovation Dust

Before picking up the vacuum, it helps to understand what you’re dealing with. Renovation dust isn’t like the dust that accumulates during everyday life. It’s finer, heavier, and often contains a mix of plaster, wood, drywall, paint residues, and sometimes silica particles. These particles can settle deep into carpets, upholstery, and ventilation systems.

Types of Dust and Their Impact

Dust from construction can be categorised into a few main types:

  • Plaster and drywall dust: Very fine and airborne, often covering surfaces like a powdery film.
  • Wood dust: Coarser than plaster dust but sticky in nature due to sawdust oils.
  • Paint and finish residues: Can include both powdered pigments and chemical residues.
  • Silica dust: Found in cement, concrete, and tiles. Long-term exposure can cause respiratory issues if not properly removed.

Recognising the type of dust helps determine the right cleaning method, tools, and protective measures.


Planning Your Post-Renovation Cleaning

Attempting to clean without a structured plan is inefficient and can leave residue behind. Professional after-builders cleaners treat post-renovation cleaning as a staged process.

Assessing the Scale of the Job

Walk through the property and identify areas with heavy dust build-up. Consider the following:

  • Rooms with drywall work or sanding activity
  • Kitchens or bathrooms with tile or cabinet installation
  • Floors and skirting boards throughout
  • Air vents and ducting

Take note of surfaces that require specialised treatment, such as marble countertops or delicate cabinetry.

Preparing the Right Equipment

After-builders cleaning requires more than your standard household vacuum and mop. Recommended equipment includes:

  • HEPA-filter vacuum: Captures fine particles without redistributing them.
  • Microfibre cloths and dusters: Traps dust rather than pushing it around.
  • Industrial dust mops: Effective on hard floors before vacuuming.
  • Protective gear: Respirators, gloves, and goggles for areas with heavy airborne dust.

Having the right tools at hand makes the process faster, safer, and more thorough.


Step-by-Step Cleaning Process

Post-renovation cleaning follows a logical sequence. Professionals recommend starting from the top and working down, tackling dust in layers.

Initial Dust Containment

Before cleaning surfaces, contain airborne dust:

  1. Close doors to unaffected rooms and seal with dust sheets or temporary barriers.
  2. Use air purifiers or negative pressure machines in highly dusty areas if available.
  3. Remove loose debris such as plaster chunks, sawdust, or packaging.

Containment reduces cross-contamination and makes the cleaning process more efficient.

Ceiling, Walls, and High Surfaces

Dust settles quickly on elevated surfaces. Professionals start at the top:

  • Wipe down ceilings, beams, and cornices with a dry microfibre cloth.
  • Use an extendable duster for high spots, followed by a slightly damp cloth for stubborn residues.
  • Pay attention to light fixtures, ceiling fans, and ventilation grills.

Working from the top down ensures dust doesn’t resettle on already cleaned areas.

Windows, Frames, and Sills

Windows often bear a heavy layer of dust from sanding, painting, or plastering. Clean them carefully:

  • Remove dust from sills and frames with a soft brush or microfibre cloth.
  • Wash glass with a streak-free solution.
  • Check and clean window tracks, which trap fine particles.

Proper window cleaning brightens a room and removes dust that could become airborne again.

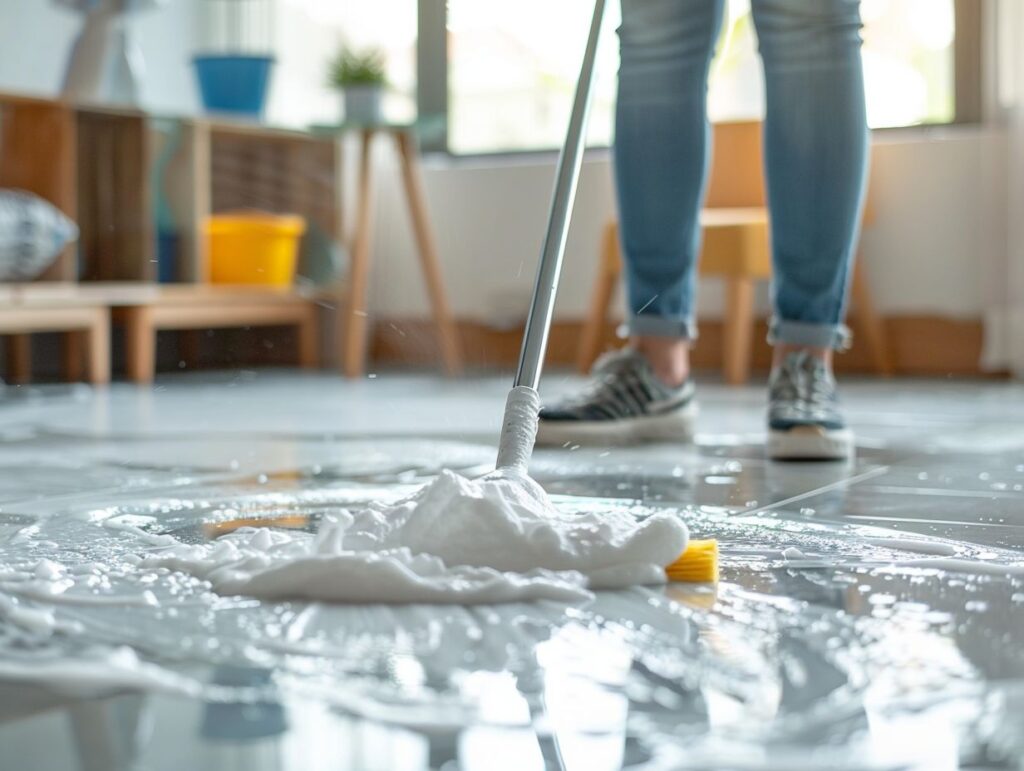
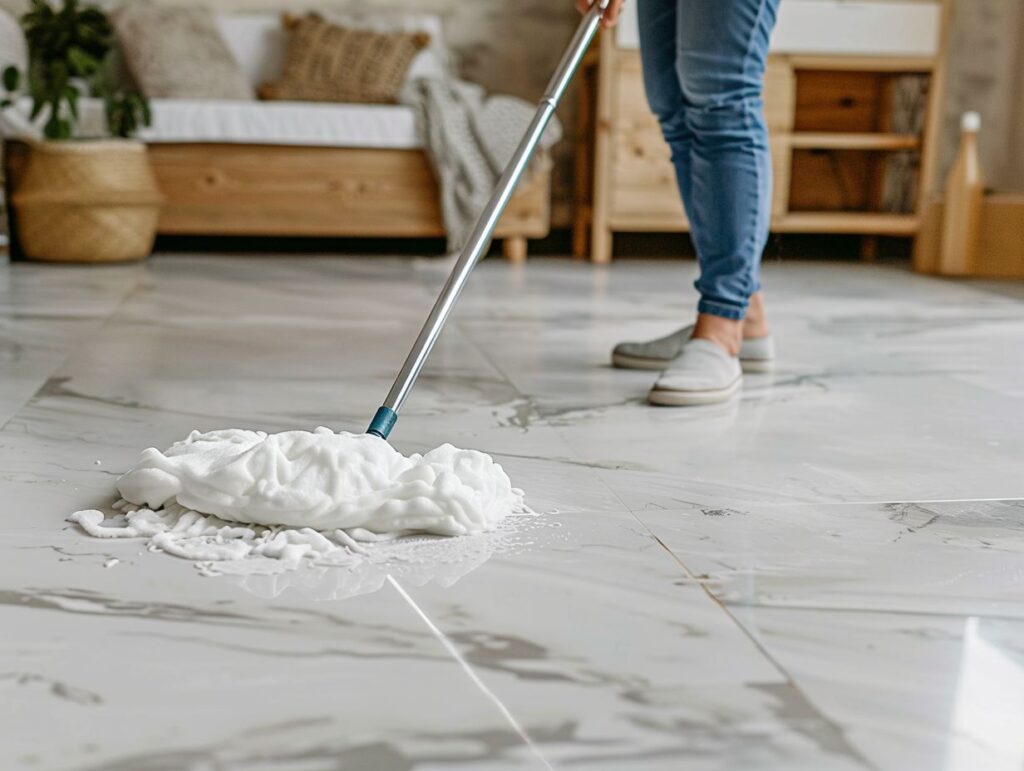
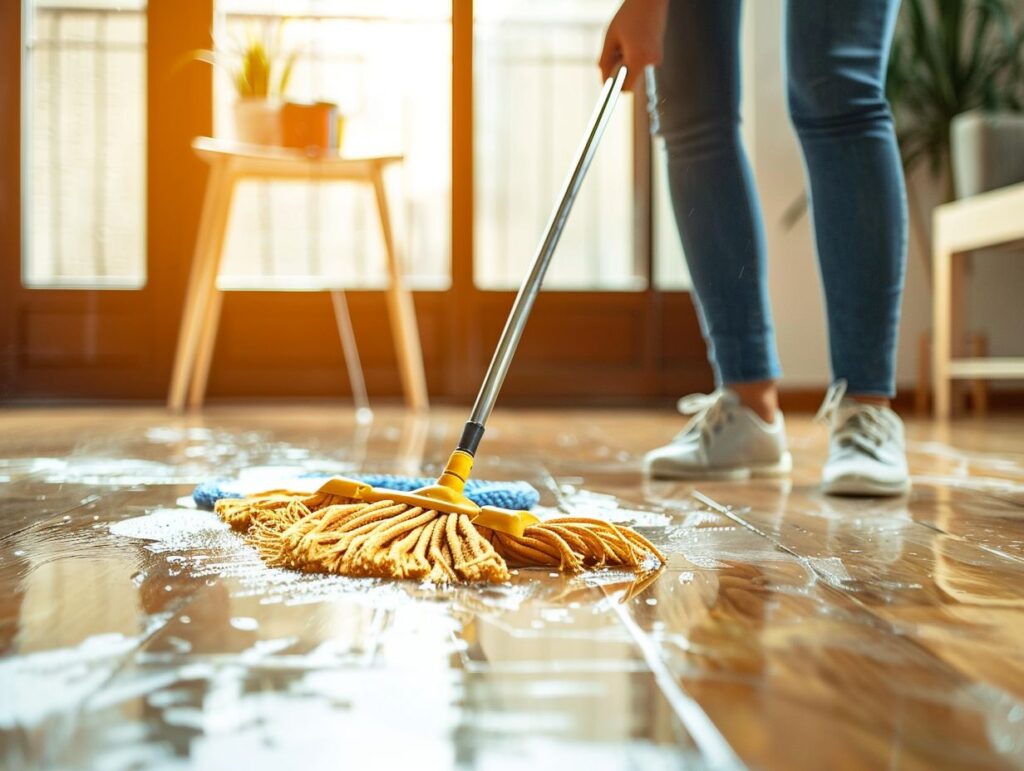
Floors and Skirting Boards

Floors accumulate the most dust and require a staged approach:

  • Sweep or dust mop hard floors before vacuuming.
  • Use a HEPA-filter vacuum to capture fine dust from carpets, rugs, and upholstery edges.
  • Wash hard floors with warm water and neutral detergent, ensuring corners and skirting boards are cleaned last.

Skirting boards are often overlooked, but cleaning them removes dust that settles and becomes airborne repeatedly.

Kitchens and Bathrooms

These areas require special attention due to surfaces sensitive to dust and residue:

  • Wipe down cabinets, countertops, and tiles with a damp microfibre cloth.
  • Remove dust from sinks, taps, and appliance surfaces.
  • Clean grout lines in tiled areas, which trap dust from tile cutting and plastering.

Thorough cleaning in these spaces prevents dust from mixing with moisture and forming stubborn films or residue.


Handling Special Situations

Large-scale renovations often present unique cleaning challenges. Professionals anticipate these scenarios.

Upholstery and Soft Furnishings

Dust can penetrate upholstery and curtains:

  • Vacuum sofas, chairs, and curtains with a brush attachment.
  • For delicate fabrics, consider professional steam cleaning to remove deep-seated dust.
  • Wash removable covers and cushions where possible.

Failing to clean soft furnishings thoroughly allows dust to continue circulating in the home.

Air Vents and Ducts

Air vents are a hidden source of dust circulation:

  • Remove vent covers and wipe them with a damp cloth.
  • Vacuum ducts using a flexible hose attachment if accessible.
  • Consider a professional duct cleaning service if dust remains heavy or if the system has been compromised.

Cleaning ventilation pathways significantly improves indoor air quality after renovation.

Final Touches

Once the bulk of the dust has been removed:

  • Wipe all switch plates, door handles, and furniture surfaces.
  • Check corners and behind radiators for lingering dust.
  • Polish or buff surfaces according to material specifications.

This final step ensures no residual dust remains and that the home is safe and habitable.


Preventive Measures for Future Renovations

After a thorough clean, it is worth planning ahead to reduce future dust issues:

  • Use dust barriers during renovations to isolate work areas.
  • Request contractors to use dust extractors when sanding or cutting materials.
  • Schedule regular maintenance cleaning post-project to prevent accumulation.

These steps protect your investment in the property and maintain a healthy environment.


Professional After-Builders Cleaning Services

While DIY cleaning is possible, many homeowners prefer professional after-builders cleaners for large projects. Professionals bring:

  • Industry-standard tools and HEPA-filter vacuums
  • Experience in safely handling hazardous dust, including silica
  • Time-efficient methods that prevent damage to delicate surfaces

Hiring an experienced service ensures comprehensive results, often in a fraction of the time required for a DIY clean.


Post-renovation dust may seem overwhelming at first, but a structured approach makes the task manageable. By assessing the type of dust, planning your cleaning, and following a methodical process from top to bottom, you can restore your home efficiently. Whether you tackle it yourself or hire a professional, thorough cleaning preserves both your property and your health. A well-cleaned home post-renovation is more than aesthetics—it’s about creating a safe, comfortable, and truly livable space.

How To Thoroughly Clean Your Floors After Renovation

Are you fed up with the mess left behind after a renovation? Thoroughly cleaning the floors is key to making your newly revamped space look top-notch.

Let us walk you through the pre-cleaning setup, getting rid of dust and debris, using deep cleaning methods, and those final touches to make those floors gleaming.

We’ll even throw in some tips on keeping those floors spick and span after the renovation. Get the lowdown on how to give your floors a proper scrub and bask in the glory of your newly renovated space.

Cleaning Your Floors After a Renovation

Cleaning Your Floors After a Renovation

After any home renovation, you need to thoroughly clean your floors to get rid of all that dust, debris, and residue hanging around. This will bring your living space back to its sparkling best and stop any potential long-term damage or wear.

Why it’s Important to Clean Properly

Proper cleaning after a renovation is crucial for more than just looks—it’s also about your health, especially if you want to avoid triggering allergies or asthma.

After a renovation, all that dust and debris hanging around can trap allergens and irritants. When these get stirred up and float in the air, they can spell trouble for your respiratory system, especially if you already have allergies or asthma. The key is to give all your surfaces a good scrub, banish those pesky dust particles, and improve the air quality inside your home. Doing this can help lower the chances of breathing issues and other health problems.

Remember to wear protective gear—masks and gloves are your best friends here. They’ll shield you from inhaling nasty particles, keeping you safe and ensuring your cleaning efforts are effective and trouble-free.

Pre-Cleaning Preparation

Before you begin cleaning, ensure you are ready. Ensure proper ventilation, gather all the supplies you need, and wear protective gear like gloves, eye protection, and a respirator.

Gathering Supplies and Protecting Surfaces

When you’re getting ready to clean, ensure you have all the right supplies. You’ll need your trusty broom, a soft microfibre cloth, a squeegee for those streak-free windows, an excellent ol’ bucket, some water, detergent, vinegar, and bicarbonate of soda.

These cleaning essentials each have their particular jobs:

  • Grab the broom to sweep up debris.
  • Use the microfibre cloth to dust and polish your surfaces.
  • Break out the squeegee for sparkling clean windows.
  • Pop the detergent and water in the bucket for your all-purpose cleaning mix.
  • Dilute your cleaning solutions with water.
  • Break out the vinegar for its disinfecting powers.
  • And don’t forget the bicarbonate of soda for tackling those stubborn stains.

It’s also important to protect your surfaces while you clean to avoid damage. Try using furniture pads under heavy pieces, coasters for your drinks, and rugs in those high-traffic spots. And if you’re feeling adventurous, try steam cleaning for a deep floor clean or let a robot vacuum handle your daily maintenance.

Gathering Supplies and Protecting Surfaces

Removing Dust and Debris

In the post-renovation cleaning process, you must remove the dust and debris on your floors. This means you should sweep, mop, and hoover to make sure you don’t leave any particles behind.

Vacuuming and Sweeping Techniques

In terms of getting your floors squeaky clean, you’ve got to nail those vacuuming and sweeping techniques to remove all those pesky loose particles and get your floors ready for a deeper clean. Depending on the type of floor you’re dealing with, you need to cater your approach to meet its unique needs. Here’s the lowdown:

  • If you’re tackling carpets, grab a vacuum with a beater brush to shake up the fibres and release embedded dirt. Remember to go over each area more than once for a thorough cleaning.
  • For hardwood or tile floors, use a vacuum with a tricky floor setting or a gentle-bristled broom to avoid scratching.
  • When it’s time for hardwood floors, consider using microfibre cloths or mops to trap dust and prevent it from spreading.
Deep Cleaning Your Floors

Deep Cleaning Your Floors

When tackling your floors, ensure you’re not just skimming the surface. Get deep to banish those stubborn stains, grime, and residues. That way, your floors won’t just be clean; they’ll look fresh, well-cared for, and rejuvenated.

Choosing the Right Cleaning Products

When cleaning, you want to make sure you’re using the right products to get rid of stains and grime without damaging your floors.

  1. If you’re dealing with grease and grime in the kitchen, detergents are your best bet for cutting through the mess on counters and appliances.
  2. For a natural disinfectant, vinegar is your go-to for tackling mould and mildew in the bathroom.
  3. Baking soda is your friend for deodorising carpets and eliminating odours.
  4. And if you want a chemical-free deep clean, steam cleaners are your answer for sanitising different surfaces.

Remember to read the product labels, follow the instructions, and test a small hidden spot before using any cleaning solution to ensure it works with your floors.

Specific Techniques for Different Flooring Types

Regarding different flooring types like hardwood, tile, laminate, and vinyl, you need to use specific cleaning techniques to keep them looking their best without causing any damage. If you have hardwood floors, clean them with a pH-neutral cleaner and a damp mop to keep them shining. Just a heads up, don’t go overboard with water on hardwoods, as too much can make them warp. If you’re dealing with tile floors, a mix of warm water and vinegar does wonders to get rid of dirt and grime. For laminate floors, grab a microfibre mop and a mild detergent – steer clear of any rough tools that could scratch the surface. And if you’ve got vinyl floors, stick to regular sweeping and mopping with a gentle cleaner to prevent discolouration and keep that shiny look intact.

Finishing Touches

After you’ve scrubbed your floors well, it’s time to add the final touches, such as polish, wax, or sealant, to keep them looking fabulous and protect their shine. This will quickly restore their original beauty.

Polishing and Protecting Your Floors

To keep your floors looking their best, you must use products like polish, wax, and sealant to keep them shiny and protected.

After you’ve cleaned and prepped your floor, it’s time to apply your chosen polish. Grab a mop or applicator, and cover the floor evenly. This step will bring back the shine and smoothness of your floor, eliminating any minor scratches or imperfections. Once the polish has dried, it’s time to add a protective layer of wax or sealant. This layer will protect your floor from stains, spills, and everyday wear and tear. These final touches act as a barrier against dirt and moisture, making cleaning easier and extending the life of your floors.

Maintaining Clean Floors

Keeping your floors clean after a renovation is an ongoing task that requires time, patience, and the right techniques to ensure they stay in tip-top condition.

Tips for Keeping Your Floors Clean After Renovation

To keep your floors clean after a renovation, follow these maintenance tips and techniques using the right cleaning solutions and tools. For daily upkeep, sweep or vacuum regularly to prevent dirt and debris from piling up.

If you have hardwood or laminate floors, consider using a damp mop with a mild detergent for a thorough clean. When it’s time for a deeper clean each week, go for specialised floor cleaners that match your specific floor material. Steer clear of harsh chemicals that could harm the finish.

Invest in a good-quality microfibre mop for efficient and gentle cleaning, and remember to switch out the mop heads often to avoid spreading dirt. These simple practices will keep your floors sparkling and help them stay in top shape for the long haul.

How To Remove Paint Droplets From Walls After Redecoration

Are you frustrated by the appearance of paint droplets on your walls after redecoration? We discuss the reasons behind the appearance of paint droplets and the different types you may encounter. We also provide practical tips on preventing paint droplets from appearing and methods for removing fresh and dried paint droplets.

Get expert advice on how to tackle this common painting dilemma!

How To Remove Paint Droplets From Walls After Redecoration

What Are The Different Types of Paint Droplets?

Paint droplets on walls can manifest in multiple forms, including paint splatter from a fresh coat, accidental paint marks, or imperfections left behind during the painting process.

Paint splatter is one of the most common paint droplets on walls. It often results from a hasty application or excessive paint on brushes or rollers, which can create scattered, irregular paint spots on the wall surface.

On the other hand, fresh coat marks occur when a second coat is applied before the first coat has thoroughly dried, leading to visible streaks or overlapping areas.

Accidental paint stains may happen when paint drips or spills onto the wall, leaving unsightly patches that can be challenging to remove without professional intervention.

Oil-based Paint Droplets

Oil-based paint droplets can be particularly challenging to remove from surfaces, requiring specialised cleaning techniques or professional painting services for effective restoration.

These stubborn stains tend to penetrate deeply into porous materials like wood or fabric, making them especially difficult to eradicate. Simply scrubbing the paint off may not suffice, as it can leave behind residue or damage the underlying surface. In such cases, seeking the assistance of professionals with the right tools and knowledge becomes crucial. Specialised solvents or paint strippers may be needed to dissolve the paint without harming the material beneath, emphasising the importance of expertise in dealing with these challenging situations.

Water-based Paint Droplets

Water-based paint droplets are more common and can often be removed using a suitable cleaning solution or interior paint touch-up techniques for a seamless finish.

These versatile paint droplets can be found in various finishes, such as matte, satin, or gloss. When dealing with dried water-based paint stains, choosing the right cleaning agent is crucial to avoid damaging the surface underneath. For interior paint touch-ups, matching the paint type and sheen is essential to ensure a uniform appearance. Selecting high-quality paint and applying proper techniques can produce long-lasting and vibrant results.

How To Prevent Paint Droplets From Appearing On Walls?

Preventing paint droplets on walls involves meticulous preparation before painting, using high-quality paint and tools, and applying paint in thin, even coats to minimise the risk of splatters and imperfections.

Proper preparation starts with cleaning the walls thoroughly to remove any dirt, dust, or grease that can interfere with paint adhesion. Ensure that the surface is smooth and dry before beginning.

Selecting a high-quality paint suitable for the specific surface type can significantly improve the final result. When it comes to tools, investing in quality brushes and rollers can help achieve a smoother application. Techniques such as maintaining consistent pressure while painting and using a steady hand can aid in applying the paint thinly and evenly, resulting in a professional-looking finish.

Proper Preparation Before Painting

Proper preparation before painting is crucial to prevent issues like paint spills, requiring essential cleaning supplies and equipment to maintain a tidy workspace and minimise accidental splatters.

You can effectively manage potential paint spills and protect your surfaces from damage using appropriate cleaning supplies, such as dust sheetspainter’s tape, and protective equipment. In addition, having the right tools, such as brushesrollers, and trays, ensures a conducive environment for a successful painting project. Setting up your workspace correctly safeguards your surroundings and streamlines the painting process, allowing you to focus on achieving a professional finish.

Use High-Quality Paint and Tools

Investing in high-quality paint and tools is essential when repainting house walls or redecorating spaces to achieve a professional finish and reduce the likelihood of paint splatters or imperfections.

Premium quality paint provides better coverage and colour consistency and enhances the paint job’s durability, ensuring long-lasting results that can withstand daily wear and tear.

Using top-notch tools such as high-quality brushes and rollers can significantly impact the smoothness and uniformity of the paint application, resulting in a flawless and polished look.

Brands like Benjamin MooreSherwin-Williams, and Behr are known for superior paint quality. They offer various colours and finishes to suit different preferences and interior styles.

Apply Paint in Thin Coats

Applying paint in thin coats is a fundamental practice in interior design and restoration projects, contributing to maintaining a well-maintained home with a refreshed appearance.

Thinning out the paint ensures better surface adhesion, reduces the chances of drips and runs, and allows for smoother coverage. By applying paint thinly, you can achieve a more professional finish and avoid the common pitfalls of thick, uneven coats. It also helps prevent paint build-up, which can lead to cracking or peeling over time.

To optimise results, make surety brushes or rollers and clean them properly between coats to minimise paint splatter. Consider priming surfaces before painting to enhance durability and colour richness.

How To Remove Fresh Paint Droplets?

To remove fresh paint droplets, immediate action using a suitable cleaning solution can effectively tackle paint spills on walls, ensuring a seamless finish for your redecoration projects.

  1. Begin gently wiping excess paint droplets with a soft cloth or kitchen roll.
  2. Next, dampen a clean cloth with warm, soapy water and gently dab the affected areas to help lift the paint.
  3. For stubborn spots, consider using a mild paint thinner or surgical spirit on a cotton bud, ensuring to test in an inconspicuous area first.
  4. Once the paint is removed, rinse the wall with clean water and dry it thoroughly with a lint-free cloth to avoid streaks.
  5. Buff the cleaned area with a microfibre cloth to restore its original shine.

Use a Damp Cloth or Sponge

A damp cloth or sponge is suitable for cleaning fresh paint droplets. It is for various home projects and offers renovation tips for maintaining a pristine finish.

Whether you are touching up walls, refinishing furniture, or adding a splash of colour to your space, the flexibility of using a damp cloth or sponge allows you to tackle paint spillages with ease. For optimal results, gently dab the affected area to lift the excess paint while avoiding smearing or spreading. This technique saves you time and effort and ensures a seamless restoration process, leaving your surfaces looking as good as new.

Use a Paint Thinner or Solvent

When dealing with stubborn fresh paint droplets, employing a paint thinner or solvent can aid in repainting house surfaces and refurbishing areas affected by paint splatter for a flawless finish.

This method proves beneficial, especially in situations where traditional cleaning methods fail. Paint thinners effectively break down the paint residue, making removing it easier without damaging the underlying surface. You can achieve a smoother paint finish using a solvent, such as white spirit or acetone, and ensure the new coat adheres properly.

It’s essential to follow safety guidelines when using these chemicals, such as working in a well-ventilated area and wearing protective gear like gloves and goggles. Proper disposal of used solvents is also crucial for environmental safety.

Scrape the Paint Off

In fresh paint droplets, gently scraping the paint off with appropriate tools is a viable maintenance solution and a quick fix using touch-up paint to address minor imperfections.

It’s essential to approach this task carefully to avoid damaging the underlying wall surface. When selecting tools for scraping, opt for plastic or rubber scrapers to minimise the risk of gouging or scratching the paint layers.

Once the unwanted paint has been removed, touch-up paint can seamlessly blend any remaining blemishes. Remember to match the touch-up paint colour as closely as possible to achieve a consistent finish.

Regular monitoring and tackling such minor imperfections can help prolong your walls’ overall appearance and structural integrity.

How To Remove Dried Paint Droplets?

Dealing with dried paint droplets requires specific equipment and techniques suitable for various home projects, offering effective solutions to restore wall surfaces affected by paint splatter.

One key challenge when tackling these stubborn stains left behind by paint droplets is ensuring the removal process doesn’t damage the underlying surface. To address this, it’s essential to choose the right tools and methods depending on the type of paint and the wall material.

For example, a gentle scrubbing with warm, soapy water and a sponge can work wonders for emulsion paint on a plasterboard surface. A mild solvent and a soft cloth may suit oil-based paints or delicate surfaces.

Tailoring your approach to the specific situation is crucial to achieving successful wall care maintenance and keeping your walls looking fresh and clean.

Use a Razor Blade or Scraper

Employing a razor blade or scraper is a practical approach for home repairs and ordinary household tasks to remove dried paint stains effectively, ensuring a clean surface free from unsightly blemishes.

These tools are convenient when dealing with stubborn paint droplets that may have dried on various surfaces. To tackle paint stains on walls, hold the razor blade or scraper slightly to the surface and gently scrape away the dried paint. Proceed cautiously to avoid damaging the wall underneath. For difficult spots, a gentle back-and-forth motion can help loosen the paint without causing harm. Always wear protective gloves and work in a well-ventilated area to ensure safety.

Apply Heat to Soften the Paint

Applying heat to soften dried paint droplets is recommended for cleaning wall surfaces and achieving home upgrades. It helps to spruce up interiors by effectively addressing persistent paint splatter.

The dried paint softens by gently applying heat, such as using a heat gun or a hairdryer on a low setting, making it easier to scrape off without damaging the underlying surface. This method saves time and effort and prevents the need for harsh chemicals that can potentially harm walls. By carefully managing dried paint imperfections, homeowners can seamlessly touch up areas and maintain a fresh look in their living spaces.

Use a Chemical Paint Remover

Utilising a chemical paint remover is an efficient solution for household fixes and refurbishment projects, enabling. It enables all dried paint droplets and ensures a shed appearance for walls.

This method proves particularly advantageous when dealing with stubborn paint stains that have dried onto surfaces, offering a convenient way to restore walls to their original state. One can effectively achieve a revitalised wall finish by following proper application techniques, such as generously applying the remover and allowing it to sit before gently scraping away the paint residue. Using a chemical paint remover can save time and effort compared to traditional scraping methods, making it a preferred choice for those seeking quick and efficient results.

What Are Some Tips for Removing Paint Droplets?

When removing paint droplets, consider working in a well-ventilated area, using protective gear and testing products on a small area first to ensure effective paint cleanup and a successful redecoration.

Prioritising safety measures during paint cleanup is crucial to avoid any health risks from inhaling fumes or coming into direct contact with harsh chemicals. Taking the time to test different products on a small, inconspicuous area helps determine their efficacy without causing damage to the surface beneath. Environmental considerations play a significant role in choosing the suitable paint removal method, ensuring it aligns with eco-friendly practices. Integrating these elements into your paint removal process allows you to streamline the cleanup and achieve optimal results for your redecoration project.

Work in a Well-Ventilated Area

Working in a well-ventilated area is essential for wall touch-ups, painting techniques, and home repairs to ensure proper ventilation and safety during paint removal and redecoration.

Adequate airflow helps maintain a fresh atmosphere and plays a significant role in promoting a healthier work environment.

When engaged in surface preparation, priming, and final painting coats, optimal conditions allow the paint to dry efficiently and evenly, producing a professional finish.

Working in a well-ventilated space reduces the risk of inhaling harmful fumes from paint products, ensuring the safety and well-being of those involved in the renovation or improvement process.

Use Protective Gear

Protective gear is crucial for home maintenance, decorating projects, sprucing up interiors, safeguarding against potential hazards and ensuring a safe environment for paint removal and redecoration tasks.

Wearing protective gear such as glovesgogglesmasks, and coveralls can significantly reduce the risks of exposure to harmful chemicals, dust, and fumes commonly associated with paint stripping and redecorating activities. Safety equipment acts as a shield, providing a barrier between the skin, eyes, and respiratory system, preventing potential injuries and health hazards.

By prioritising safety and donning the appropriate gear, individuals can enjoy peace of mind, focus on the task at hand, and create a secure working environment conducive to efficient and accident-free completion of home improvement projects.

Test Products on a Small Area First

Before completing the application, always test paint removal products on a small area first to ensure compatibility, efficacy, and minimal damage, incorporating essential maintenance tips for maintaining wall care standards and household maintenance practices.

This practice is crucial to avoid any potential adverse reactions or damage to the surface. By conducting a small test area, you can assess whether the product works effectively on the paint or surface you are dealing with. It lets you observe potential risks such as colour fading, staining, or unintended reactions.

Following essential tips for proper wall care and household maintenance is vital to ensure smooth and efficient paint removal.

Construction Cleanup-What To Expect?

Renovation procedures and building work in new homes cause a real mess, which would be a problem for the successful completion of the projects.

The so-called rough clean is the first step of the post-construction operation. It involves rubbish remove, dust and debris clean-up and commonly is done partly before the client to walk through the site and check if there any constructional defects and how the builders cope with the draft.

The second stage of the after builders clean is a more detailed job because it is the last one of the trial. It is necessary to be eliminated all type of defects linked with the cleanliness like splatters on the windows, аwry grout lines, grout haze on tiles, paint spots, etc. The good job done is extremely important to be noticed the imperfections of the whole building process.

Time is money for builders and tradesman and most of the companies prefer to hire a professional construction cleaning service that provides all of the standards in this sphere according to the individual scope of requirements.